Seidou Bronze - Eye Candy Pigments
Code: 6048/000005 6048/000025 6048/000050 Choose variantProduct detailed description
Seidou Bronze is a shimmering bronze pigment made with titanium dioxide, perfect for a wide range of creative DIY projects. This fine mica powder is ideal for use in plastics, slime making, bath bombs, jewelry making, melt and pour, candles, and other applications like acrylic painting or screen printing. Seidou Bronze adds a sophisticated metallic shimmer that stands out with its depth and shine.
The Seidou Bronze pigment is known for its versatility and ease of use. Its soft bronze shimmer is the perfect choice for creators looking to add an elegant and professional touch to their projects. Whether you’re working on plastic projects, watercolors, or creating cosmetics, Seidou Bronze ensures a long-lasting effect and rich metallic luster. This pigment is a great option for those seeking a metallic bronze effect with maximum visual impact.
For artists and crafters aiming to achieve a radiant bronze effect, Seidou Bronze is an essential addition. Its high concentration allows for intense results with just a small amount, ensuring a lasting and bold finish in any project.
Technical parameters and information
Ingredients and Particle Size
- Particle size : 10-100 μm
- Ingredients: Fluorphlogopite, Titanium Dioxide
- Heat Threshold: 1000 °F - 1832 °F (538 °C - 1000 °C)
Additional Data
- Product Type : Mica
- Vegan : Yes
- Soaps : Yes
- Epoxy Resin : Yes
- Acrylic : Yes
- FDA-Permitted for External Use : Yes
- FDA-Permitted for Eye Area Use : Yes
- FDA-Permitted for General (Including Lips) Use : Yes
- FDA-Permitted for Bath Bombs Use : Yes
How to Mix Pigments Properly – Tips and Tricks
Mixing with epoxy resin
The most common question we receive is: “How much pigment per liter of epoxy?” This is a very valid question, but unfortunately, there is no definitive answer due to the various types of applications and variations.
- Therefore, we recommend 1-2 grams per 1000 ml, and add more as needed.
For example: Are you aiming for an opaque or transparent look? Lighter colors may require more pigment to achieve the desired shade.
Why micron sizes matter
Please be aware of the pigment’s micron size. The larger the micron, the larger the particle. Typical pigments have an average particle size of 10-60 μm. Note that larger micron-sized pigments will likely have a heavier density, causing the pigment to sink faster in fresh epoxy, such as in deep pours. For example, our Icicle or 14k Nugget Gold pigments have a size of 200-700 μm and will likely sink faster in fresh epoxy. To prevent sinking, let the epoxy settle a bit, or return to your project and “stir” it again.
How to Use Pigments for Soap Making
Pigments are often used to color soaps, whether using the cold process or hot process methods. Choosing the right pigment and optimal ratio is key to achieving an even and vibrant color without altering the soap’s texture. Pigments allow for a wide range of shades, from subtle to intense, with easy adjustment of the amount depending on your needs.
To achieve perfect results, it’s important to follow the correct ratios. Using too much pigment can change the texture of the soap or cause excessive coloring during use. The following recommendations provide a starting point for precise pigment mixing, with the option to adjust the pigment amount as needed.
Recommended Mixing Ratios
- Cold process: Use 2 teaspoons of pigment per 1 lb (450 g) of oils.
- Hot process: Use ½ teaspoon of pigment per 1 lb (450 g) of melt-and-pour soap base.
Following these ratios will give you vibrant colors and even pigment distribution in your soap. Pigments are an excellent choice for producing naturally colored soaps without affecting the structure or quality of the final product.
This method is perfect for those who want to create personalized soaps with a professional look and long-lasting color.
How to Use Pigments for Automotive – Ratios and Tips
Pigments are widely used in automotive coatings and removable paints, providing rich colors and unique visual effects. To achieve optimal results, it is essential to follow the correct pigment mixing ratios with coatings, whether you’re working with Plasti Dip, standard clear coats, or other automotive paints. Pigments can be used for both permanent and removable coatings, mixed directly into the base color or applied over a topcoat.
Recommended Mixing Ratios
- Peelable automotive coatings (Plasti Dip, HaloEFX, P1Coatings, Pro Line, Autoflex): Use 50 grams of pigment per 1 gallon (3.8 L) of coating.
- Standard automotive clear coats: Use 25 grams of pigment per 1 gallon (3.8 L) of clear coat.
- Appliance paint and coatings: Use 25 grams of pigment per 1 gallon (3.8 L) of paint.
- Architectural coatings (interior and exterior): Use 10–20% by weight.
- Wallpaper and other architectural paper coatings: Use 1–5% by weight.
Peelable Coatings
- Most pigments can be sprayed with a 1.2 mm nozzle.
- Be aware of particle size—larger particles may require a larger nozzle.
- Pigments can be mixed with the base color, or mixed into the clear coat and sprayed over the base.
- Base color affects the final pigment shade: for lighter pigments (yellows, pinks), we recommend using a white base; for darker pigments, a black or dark-colored base is ideal.
Applying Pigments in Automotive Paints
- Most pigments can be used in automotive paints.
- They can be sprayed through a 1.2 mm nozzle.
- Three ways to use pigments in spraying:
- Mix directly into the base color for a unique blend.
- Mix with mid-clear and spray over the base color.
- Mix with the top coat (though this is not usually recommended due to the possibility of striping). The top coat is usually reserved for UV protection or sanding the top layer.
This versatile pigment system offers creators wide possibilities for custom automotive designs, allowing each project to be tailored through the choice of base color and the correct pigment ratios.
How to Use Pigments with Acrylic Paints – Ratios and Process
Pigments are widely used to create colorful effects in acrylic pouring. Proper pigment mixing with acrylic paints ensures a smooth and even result without clumps or bubbles. When pouring acrylic, it’s crucial to follow the right steps for preparing the pouring medium, dissolving the pigments, and blending them with the medium. This process will give you the perfect color and consistency for your creative projects.
Recommended Process for Mixing Pigments with Acrylic Paints
Step 1: Preparing the Pouring Medium
- Mix 3 partsBehr8300 Deep Base interior/exterior Hi-Gloss Enamel with 1 partJOSONJA Polyurethane Water-Based Gloss Varnish.
- Stir gently to minimize bubbles. Ensure the paint and varnish are completely mixed.
Step 2: Dissolving Pigments in the Medium
- Pour ½ to 1 teaspoon of JOSONJA Gloss Varnish into a container.
- Add around 1 teaspoon of pigment (or a bit more) and stir until the pigment dissolves completely, making sure to eliminate any clumps.
Step 3: Combining the Pouring Medium and Dissolved Pigments
- Add 3 tablespoons of the pouring medium to the dissolved pigments.
- Mix thoroughly, folding slowly rather than whipping to minimize air bubbles.
Step 4: Adjusting Consistency
- If the mixture is too thick: Add a small amount of JOSONJA and stir until the desired consistency is reached.
- If the mixture is too thin: Add a small amount of Behr8300 and stir until you achieve the correct consistency.
This process will ensure a consistent color and smooth surface, free of air bubbles, which is essential for successful acrylic pouring.
How to Use Pigments for Industrial Coatings, Plastics, and Glass – Ratios and Tips
Pigments are widely used in the production and coloring of industrial coatings, plastics, glass, and candles. To achieve consistent coloration and maintain product quality, it is essential to follow precise pigment mixing ratios. The correct pigment concentration affects the color intensity, durability, and overall quality of the final products. Each material requires different pigment ratios to ensure optimal color effects without compromising structural integrity.
Application of Pigments in Various Industrial Materials
- Vinyl wraps and plastic films: Pigments add vibrant colors and improve UV resistance, which is crucial for outdoor use.
- Plastic bottles: Low pigment concentration ensures even coloring without affecting the structure or strength of the plastic.
- Masterbatch: High pigment concentration allows manufacturers to achieve vivid color tones in plastic products.
- Plastic resins: A low pigment-to-resin ratio ensures even coloration without altering the chemical composition of the resins.
- Rubber polymers and latex: Pigments give rubber and latex durable colors that are resistant to wear and remain flexible under mechanical stress.
- Glass: Pigments color glass from light to deep shades while maintaining its transparency.
- Candles: Pigment addition provides vibrant colors without affecting the burning or structure of the candle.
Recommended Pigment Mixing Ratios
- Vinyl wraps and plastic films: Use 5–10% pigment by weight.
- Plastic bottles: Use 1–2% pigment by weight.
- Masterbatch: Use 10–30% pigment by weight.
- Plastic resins: Use 0.2–0.5% pigment by weight.
- Rubber polymers and latex: Use 5–15% pigment by weight.
- Glass: Use 1–10% pigment by weight.
- Candles: Use 5–10% pigment by weight.
Following these recommended mixing ratios ensures even coloration and optimal product quality, whether you’re working with plastic, glass, or other materials.
How to Use Pigments for Graphic and Textile Printing – Ratios and Tips
Pigments are essential in the production of graphic inks and textile printing pastes. Achieving consistent colors and sharp results in printing requires precise pigment ratios. Each type of printing requires a different concentration of pigment to achieve the desired appearance, consistency, and durability of the colors. This guide explains the recommended ratios for various printing inks and techniques.
Application of Pigments in Graphic and Textile Inks
- Flexographic inks (packaging materials): Pigments in flexographic inks ensure sharp prints on packaging materials such as paper or plastic. Higher pigment concentrations allow for vibrant color printing and fast drying, which is crucial for packaging.
- Offset printing inks: This type of printing requires lower pigment concentrations for smooth and even colors, particularly on paper and cardboard materials.
- Screen printing and screen inks: Pigments are used to produce bold graphic prints and textiles where durability and vibrant colors are essential.
- Textile printing and textile inks and pastes: Pigments are added to inks and pastes in textile printing to ensure vivid and long-lasting colors that can withstand repeated washing.
- Gravure inks: Pigments used in gravure printing are known for their high durability and are ideal for printing on thin materials such as magazines or packaging.
Recommended Pigment Mixing Ratios
- Flexographic inks (packaging materials): Use 15–25% pigment by weight.
- Offset printing inks: Use 5–10% pigment by weight.
- Screen printing and screen inks: Use 10–30% pigment by weight.
- Textile printing and textile inks and pastes: Use 5–10% pigment by weight.
- Gravure inks: Use 5–15% pigment by weight.
Why Proper Ratios Matter
Following the recommended pigment ratios ensures consistent color and long-lasting prints. Proper pigment mixing also ensures easier application, faster drying, and better resistance to wear or fading. In textile printing and other materials, maintaining optimal pigment concentration prevents unwanted defects in color or print structure.
How to Use Pigments in Cosmetic Products – Ratios and Tips
Cosmetic pigments play a crucial role in formulating cosmetic products, adding vibrant and intense colors. Achieving optimal results requires adhering to correct pigment ratios. Whether it’s for lotions, lipsticks, nail polish, or shampoos, the right amount of pigment ensures even coloration without compromising quality. Here are the recommended ratios for various cosmetic applications.
Use of Pigments in Cosmetics
- Lotions: Pigments provide subtle tinting, enhancing skin tone and ensuring a smooth, balanced finish without oversaturation.
- Lipsticks and pigmented lip glosses: Pigments create long-lasting colors that resist smudging and fading.
- Eyeshadows: High pigment content ensures intense color, offering long-lasting and smudge-resistant shades for quality eye makeup.
- Nail polishes: Pigments provide vivid colors while increasing durability and shine, crucial for attractive nail appearances.
- Shampoos: Low pigment concentration gives gentle hair tinting or enhances the shampoo’s appearance without affecting product quality.
Recommended Pigment Mixing Ratios
- Lotions: Use 1–5% pigment by weight.
- Lipsticks and pigmented lip glosses: Use 5–10% pigment by weight.
- Eyeshadows: Use 15–80% pigment by weight.
- Nail polishes: Use 5–25% pigment by weight.
- Shampoos: Use 0.1–2% pigment by weight.
Why Correct Ratios Matter
Following proper pigment ratios ensures consistent coloration and stable performance in cosmetic products. Correct pigment mixing helps achieve the desired color without negatively impacting product quality, including texture and durability. Pigments deliver long-lasting colors and premium quality in decorative cosmetics and skincare and hair care products.
How to Use Pigments with Cerakote – Ratios and Tips
Cerakote pigments are ideal for coating firearms and can also be used with KG Gunkote clears. The proper pigment ratios and recommended application techniques ensure maximum color saturation and even distribution. When working with Cerakote, it is essential to follow precise mixing ratios, test the base colors, and select the appropriate particle size for consistent results.
Use of Pigments in Cerakote and Gunkote
- Recommended Ratio: For applying Cerakote pigments, the standard ratio is 5 grams of pigment per 4 oz of clear coat.
- Base Color: For best results, a black base is recommended for dark pigments, while a lighter base is ideal for yellows, pinks, and other light colors. Always test before full application.
- Number of Coats: To achieve full saturation, apply 3 coats. Some colors may require fewer coats to reach optimal color.
- Particle Size: It is recommended to use pigments with a particle size of 10–60 μm. This size ensures even application and high-quality results. Particle sizes are listed on individual product pages or in the pigment information sheets.
- Spray Nozzle: It is recommended to use a 0.80 mm spray nozzle. For clears, some users prefer a 1.0 mm nozzle.
Recommended Ratios and Techniques
- 5 grams of pigment per 4 oz of clear coat.
- Use a black base for dark pigments and a light base for lighter colors.
- Apply 3 coats for full saturation (some colors may require fewer coats).
- Pigments with a particle size of 10–60 μm ensure optimal results.
- Recommended 0.80 mm spray nozzle, with 1.0 mm for clear coats.
Why Correct Ratios Are Important
Following proper pigment ratios and selecting the right particle size ensures even coverage and long-lasting results without streaking or imperfections. Proper spray nozzle settings and base color choices are key to achieving the desired color and durability of the coating. By using pigments correctly with Cerakote, you can achieve long-lasting color and maximum protection for firearm surface finishes.
How to Use Pigments with Lacquer Thinner – Ratios and Recommendations
Using pigments with lacquer thinner is an ideal method to achieve even staining on wood. This process involves mixing mica pigments with lacquer thinner, which ensures easy application and vibrant color saturation. Following the proper mixing ratios, application, and surface protection steps is key to achieving professional results. Below is a recommended guide for effectively dyeing wood using pigments and lacquer thinner.
Materials Needed for Wood Staining
- Mica Pigments: Choose the pigment colors you want for your project.
- Lacquer Thinner: A solvent that helps dissolve the pigments and facilitates the dyeing process.
- Mixing Container: Use a glass or metal container that is resistant to solvents.
- Stirring Stick: Use a metal or plastic stick to thoroughly mix the pigments with the lacquer thinner.
- Protective Gear: Gloves, goggles, and a mask to protect yourself from fumes and spills.
- Brush or Cloth: For applying the mixture evenly to the wood.
- Sealer: To protect the dyed wood after it has dried.
Preparation
- Work in a well-ventilated area or outdoors to avoid inhaling fumes.
- Wear protective gear to prevent skin contact or inhaling fumes.
Mixing Pigments
- Pour a small amount of lacquer thinner into your mixing container.
- Gradually add mica pigments to the thinner. Start with a small amount and adjust as needed to achieve the desired color intensity.
- Stir the mixture thoroughly until the pigments are fully dissolved. This process may take a few minutes to ensure even distribution and avoid clumping.
Testing the Mixture
- Test the mixture on a scrap piece of wood before applying it to your final piece. This will allow you to see the color and make any necessary adjustments.
- If the color is too light, add more pigment. If the color is too dark, dilute with additional lacquer thinner.
Application
- Apply the mixture to the wood using a brush or cloth, working in long, even strokes for consistent coverage.
- Allow the first coat to fully dry (usually 15–30 minutes) before applying additional coats if needed.
Finishing
- After achieving the desired color and allowing the wood to dry, apply a protective sealer such as clear lacquer, polyurethane, or another compatible wood sealer to preserve the finish.
Recommendations
- Ventilation: Always work in a well-ventilated area to avoid inhaling fumes.
- Small Batches: Mix pigments in small batches to minimize waste and maintain freshness.
- Consistent Mixing: Keep the mixture well-stirred during application to ensure consistent color.
- Safety: Follow all safety instructions for handling lacquer thinner and pigments. Dispose of used rags or brushes properly, as they may be flammable.
By following these steps, you can achieve high-quality wood staining, rich colors, and a durable finish.

Eye Candy Pigments
The American company based in Daytona Beach (Florida, USA) is a leading player in the field of metallic mica powders. The Eye Candy Pigments brand bears the stamp of quality and has a large number of satisfied customers around the world.
The range of Eye Candy products is really wide - in the offer you will find classic pigment powders as well as the Hues, Opulet, Neon, Ghosts, Glow in the Dark series and the special Colorshift and Ultrashift series.
The company has been on the market since 2014 and today is one of the leaders in the American market in its field.
Additional parameters
| Category: | Mica Pigment Powders for Epoxy Resin |
|---|---|
| Color: | Bronze |
| Particle Size [μm]: | 10-100 |
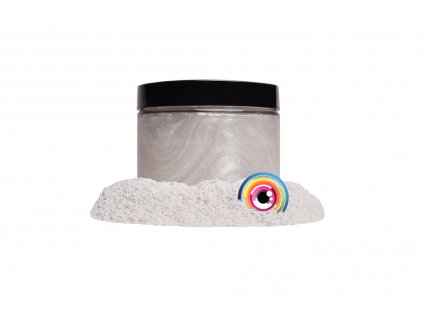
Hakushika White is an iridescent white pigment, perfect for epoxy, jewelry, and candles. It adds a soft shimmer and luxurious finish to your DIY projects.

Crimson is a red-blue pigment, perfect for epoxy, jewelry, and acrylic painting. It adds a vibrant and striking color effect to your projects.
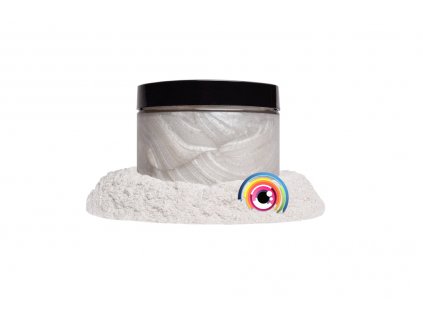
Soma White is a silver-white metallic pigment perfect for epoxy, jewelry, and candles. It provides intense shimmer, is blendable, and eco-friendly.

Baku Red is a crimson pigment with soft pink undertones, perfect for epoxy, jewelry, and acrylic painting. It adds a rich red color with a warm touch.

Gold interference pigment with mystical shimmer changing with light and surface. Perfect for resin, acrylics, jewelry, plastics, and candles.

Shimmering green pigment adding unique charm to projects. Perfect for resin, acrylics, jewelry, slimes, and candles.
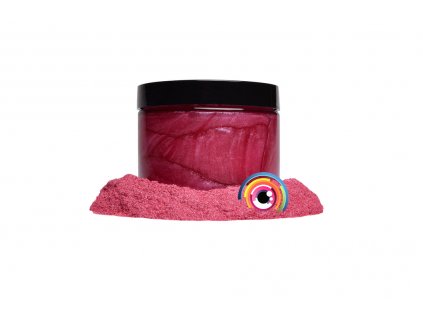
Beniimo Red is a rich red pigment ideal for epoxy, jewelry, and candles. It adds a deep, lustrous red hue and long-lasting vibrancy to your projects.

Kendo Brown is a dark brown pigment for epoxy, candles, and jewelry, adding natural depth and earthy elegance to projects.

Luxurious gold-yellow pigment for epoxy resin, wood, plastic, candles, bath bombs, jewelry, and cosmetics, adding a radiant finish and elegance to your creations.
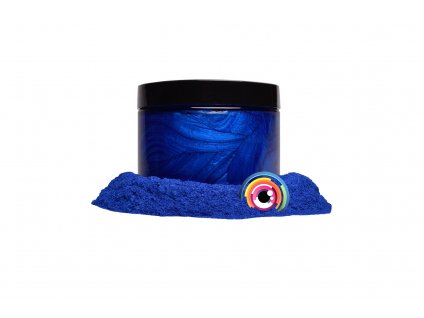
Skyline Blue brings deep sky blue tones to epoxy, jewelry, candles, and slime. This dark shade adds elegance to every creation.

Metallic gold pigment with a red hue for resin, jewelry, painting, bath bombs, cosmetics, and candles, adding luxury and shimmer to creations.
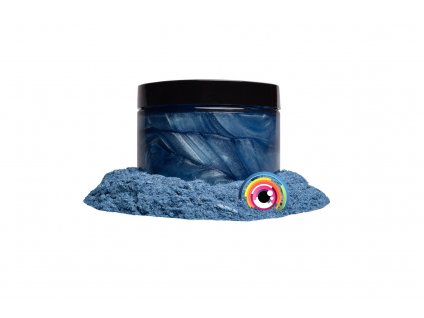
Iceburg Blue is a sophisticated blue pigment with grey undertones, perfect for epoxy, painting, jewelry, slime, bath bombs, and more creative projects.

Metallic gold pigment with medium particle size, ideal for resin, jewelry, painting, slime, and cosmetics, offering a beautiful, intense shimmer.

Light gold pigment ideal for resin, jewelry, painting, slime, bath bombs, and other creative projects, bringing a luxurious shine.
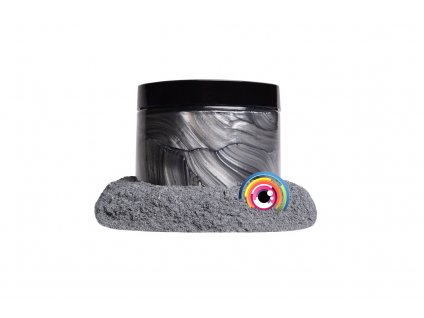
Dark metallic silver with a reflective sheen, perfect for resin, acrylics, jewelry, slime, soaps, and candles. Adds luxurious depth to projects.

Pure blue pigment, versatile for epoxy, acrylics, jewelry, slime, bath bombs, melt & pour, plastics, and candles. Adds fresh vibrancy to your creations.
Be the first who will post an article to this item!
Be the first who will post an article to this item!
